Category Archives: Tutorials

Hair-spiration: 5 Honest Tips on Using Pinterest For Hairstyling Inspiration

So you’re planning to have your hair done for a big occasion; you’re a bride-to-be, a bridesmaid-in-waiting or attending an important event like a ball or awards ceremony? Hairstyling inspiration has found a home on Pinterest and I’d like to dispel the odd myth and offer 5 top tips on making the most of that great big mood board in the sky.

I always prompt my clients to look to Pinterest for ideas on hair and makeup. It may not offer up your perfect dream style in one hit, but you can put together a selection of images which will give me a sense of your style and the vibe of your ‘do’. I use it myself to post images of my own work and other images which I find inspirational, aspirational and generally achievable for most people.

So based on many clients coming to their appointments with their screenshots and private Pinterest boards and my interpreting them, here’s how I would advise getting the most out of your searches.

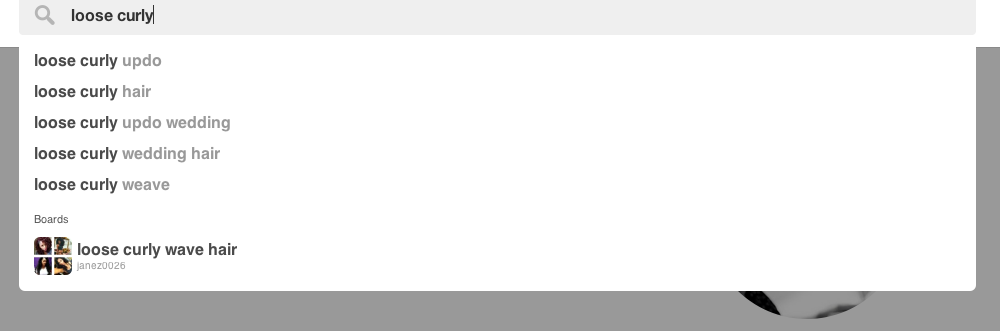
1. Search a description of what you specifically like – searching ‘wedding hair’ or anything too vague will bring up the same pictures again and again and often quite outdated styles. 

2. Search for images in your own hair colour and length – the most common occurrence in my working life is for brunettes and red heads to show me pictures of  ankle grazing fishtail braids and wispy halos of BLONDE hair. There’s a reason for this though…its not your fault. Blonde hair is better to photograph if you want detail and texture to feature heavily. Blonde hair is typically courser through treatments and will behave beautifully around heated styling; there are simply more pictures around of blonde hairstyles. (Here are a couple of examples from my own Instagram feed which illustrate my point: while both beautiful, the blonde shows more depth and tone in photographs).


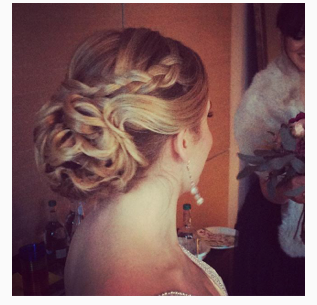
3. Texture and detail is also a challenge in real life – for the love of braids, if you have hair that is one colour and tone, brunette, fine and not massively long, then braids that create a feature in the front and side of your hair are *really not* going to look like this:

Braids eat up any volume you have in your hair – so great if it’s thick and there’s masses of it. Alternatively they can be quite piddly and token-esque in the hair type described above. We can more easily create volume in the main gathering of hair with clever padding underneath your own, leaving your hairline as naturally full as possible.

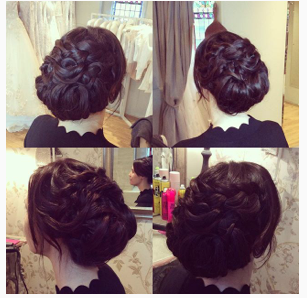
4. Save images which show multi-angles of the style – or consider that when you’re viewing the back of a style in all its intricacies, that you also need to think about the front. How will it look in the mirror and from the other side which often isn’t photographed?

5. Let your hairstylist create what works in your hair and will have staying power – bear in mind that Pinterest is for inspiration and awash with posed, recently teased, momentary snapshots. There is often a hairstylist behind the camera, artfully positioning the smallest strand, misting a shine spray and then ‘click’ – a moment in time. You want your hair to stay looking great all day/evening, right? Consider that certain styles can’t be guaranteed to last 12 hours unless you invite me to the party and I bring my hair kit…

Carolanne x


Easy Valentine’s Day Red Lipstick Tutorial

It’s the best seasonal excuse this side of Christmas to wear a bold red lipstick, whether you give a fig about Valentine’s Day or not. I love vibrant red lips and here’s how I would recommend making it current and wearable.

Step 1. Really important: apply some lip balm or something that will soften and lift off any dry skin. Carmex, Paw Paw ointment, and Lanolips are all used in my kit depending on condition of the skin. Skin Food is a really great emergency remedy. Apply and allow to absorb.www.carolannearmstrong.com // hair and makeup artist


Step 2. Do the rest of your make up. I really like the lips to be the main focus with the rest of the face quite simple. This stops you looking too made up and keeps the look current. I’ve applied serum, foundation, filled my eyebrows, cream blusher and mascara. I’m thinking runway red lip, not 50’s pin-up. (If you’re not wearing any other makeup, talk amongst yourselves for a minute.)


Step 3.  gently scrub lips to remove any skin that’s lifted off and wipe away excess balm. Use a lip liner no darker than your chosen colour to line and fill the lips. It doesn’t need to match exactly. In fact a nude lip liner is good under most lip shades. Don’t over-draw, just trace the edge of your own lip. Repeat after me: I am not Jodie Marsh/Shannon Doherty in 90210 (The Original!) The purpose of the lipliner is to prevent bleeding and give your lipstick something to stick to.image-3-e1454678726567 www.carolannearmstrong.com // hair and makeup artist

Step 4. Using a lip brush, start at the cupid’s bow and fill away from the middle, following the liner. I recommend a red lipstick with a moisturising matt finish in this process. I’m using Chanel Rouge Allure Luminous Matt Lip Colour in 51 ‘La Bouleversante’. Don’t venture too far into the corners or it can look clownish. www.carolannearmstrong.com // hair and makeup artist www.carolannearmstrong.com // hair and makeup artist www.carolannearmstrong.com // hair and makeup artist

Step 5. Blot, and repeat step 4. When I say blot, I mean press firmly. You want the colour to be pressed in,  and become stained.  (Depending on how bold you want it, you can repeat step 4 again to add another layer of colour.)www.carolannearmstrong.com // hair and makeup artist

Alternatively: To wear it in a  ‘not too fussed actually’ style, paint only onto the centre of the lips, dab and lightly blend by tapping outwards with a fingertip. It doesn’t need to look perfect, just deliberate.www.carolannearmstrong.com // hair and makeup artist

You will probably need to touch up if you’re eating and drinking. A retractable lip brush is a great thing to have with you. A straw is always helpful, but actually, I think it’s perfectly fine to leave your mark.

Carolanne x

New Website + Competition Winners!

10656264_10156264556670858_1358346083_n

Ta-da! Welcome to the new website! I hope first impressions are good; I have tried to make myself presentable.

Please do have a look around and tell me what you think?

As my first blog post I’d like to thank all my gorgeous Facebook followers who offered feedback on what they’d like to see on my blog. I have my categories lined up as you can see, plenty of food for thought and lots of ideas to be getting on with. I hope you’ll enjoy and find my posts useful, if not essential to your life..!

703461_10156264553950858_897012562_o copy

For now, as promised, the winners of my prize draw (picked at random by in-house reluctant model, V) as a thank you for all your great feedback. If your name is below, please could you email your postal address to info@carolannearmstrong.com and I’ll post them out tomorrow.

1. Charlotte Harris
2. Kim Andrews
3. Helen Seidler
4. Sarah Nuttall
5. Lindsay Parker
6. Debbie Hall
7. Michelle Antill
8. Kate Marchant
9. Gemma Thompson
10. Kate Andrews

Huge thanks again for taking the time to help. If you missed out this time, there will be more product giveaway posts in the future, so keep in touch.

Enjoy, and have a wonderful Christmas!

Carolanne x